Friday, November 23, 2007

Hummingbird Flies

Hummingbird
Christoper Grey was kind enough to include one of my photos in his most recent book "Canon DSLR: The Ultimate Photographer's Guide". His book covers all the basics in the first few chapters and then he goes over each and every button on your Canon DSLR. Chris covers Canon's software too.

I tend to use it in place of the Canon Manual. They're are several interviews with well known photographers and tons of examples. You can check the book out on Amazon.

The Hummingbird shot is one of my first digital shots. I was using a Digital Rebel with a 100-300 Canon Lens. I was still shooting JPG's and I did a bit of a crop to make a better composition. Still it holds its own.

Tech Info: Canon Digital Rebel - 6mp, Canon 100-300 Lens, f5.6,2000th of a second, ISO 400 slight crop.

For more info on Christopher Grey see his website. He has a great DVD on Lighting and many more books. His book on book on Portrait Lighting (Mater Lighting Guide for Portrait Photographers) is one of the very best photography books out there.

Perennial Favorites

Sunflower
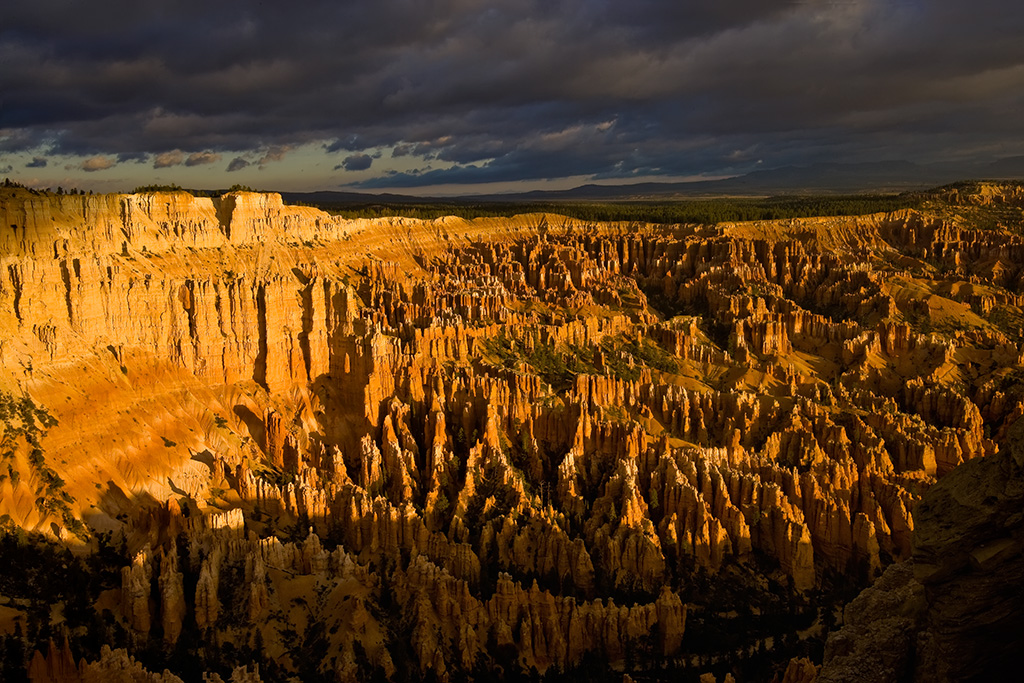
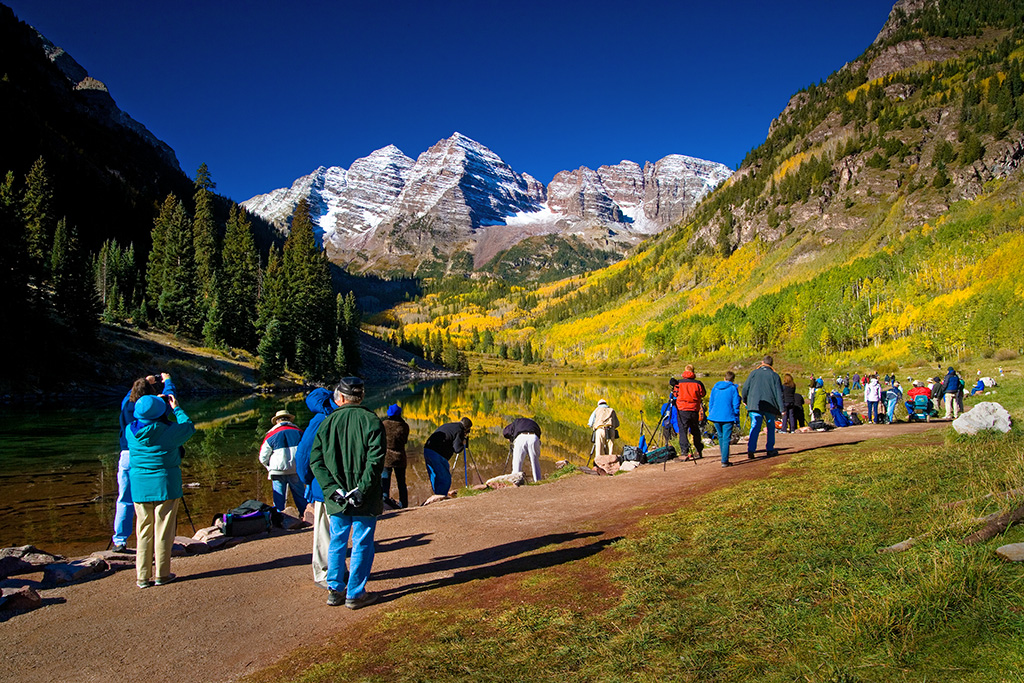
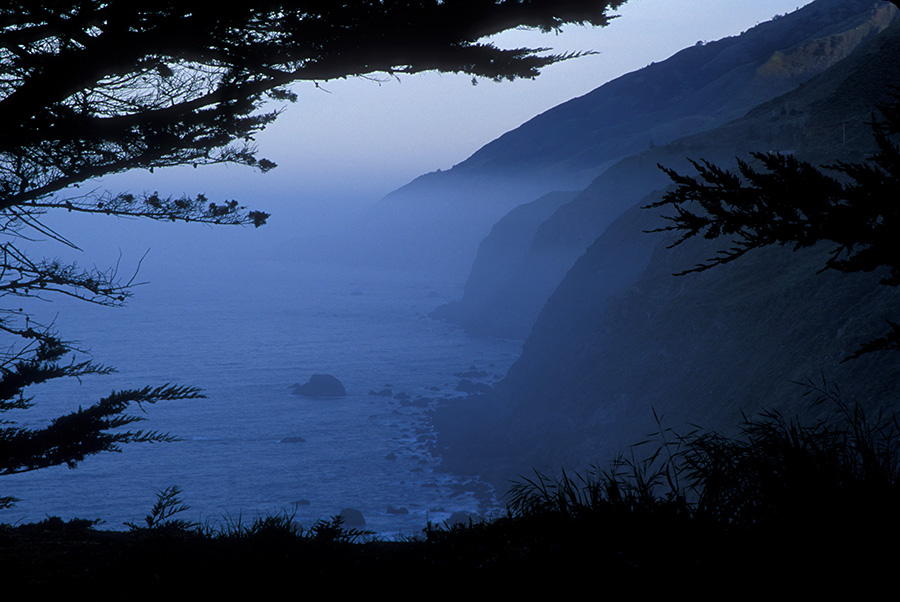
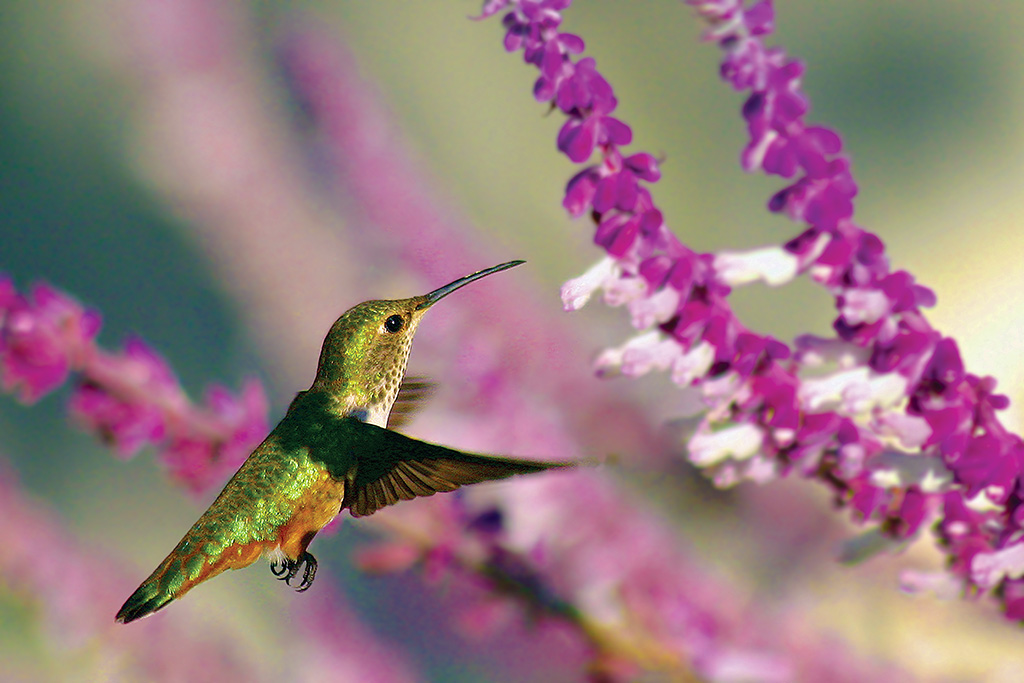
Flowers are perfect for photographic studies. The 7 basic elements of design are line, shape, color, form, space, light, and texture. All of which be found in a single blossom. I love the early morning light as it's soft and allows the colors tend to stand out. That being said many flowers such as sunflowers and poppies can be photographed in direct sunlight. Since flowers are small you can shoot from the side, the top, the bottom, and in groups or patterns. It's hard to shoot a mountain this way. You may have to drive 50 miles to make a slight difference and you may have to wait days for the right light.

Dahlia
When I'm in the field I use my 100 macro or a 70-200 for most of my close ups. At home I tend to use the 100mm macro. (60mm in a 1.6 format.) The reason is I can usually get closer to my subject at home and fill the frame with the flower. In the field I'm more concerned with the background. I like to shoot wide open at 2.8 but not always. That's the great advantage to doing a study. Anything goes. It's the best way to really learn.

Sunflower
I'm not a full time professional photographer, but I can squeeze an hour in each morning for a couple of weeks. I like to set a goal of 50 shots. I'm sure stock photographers would laugh at that since they would shoot 50 in an hour or two. The real goal is to learn a little something each day.

Abstract Flowers
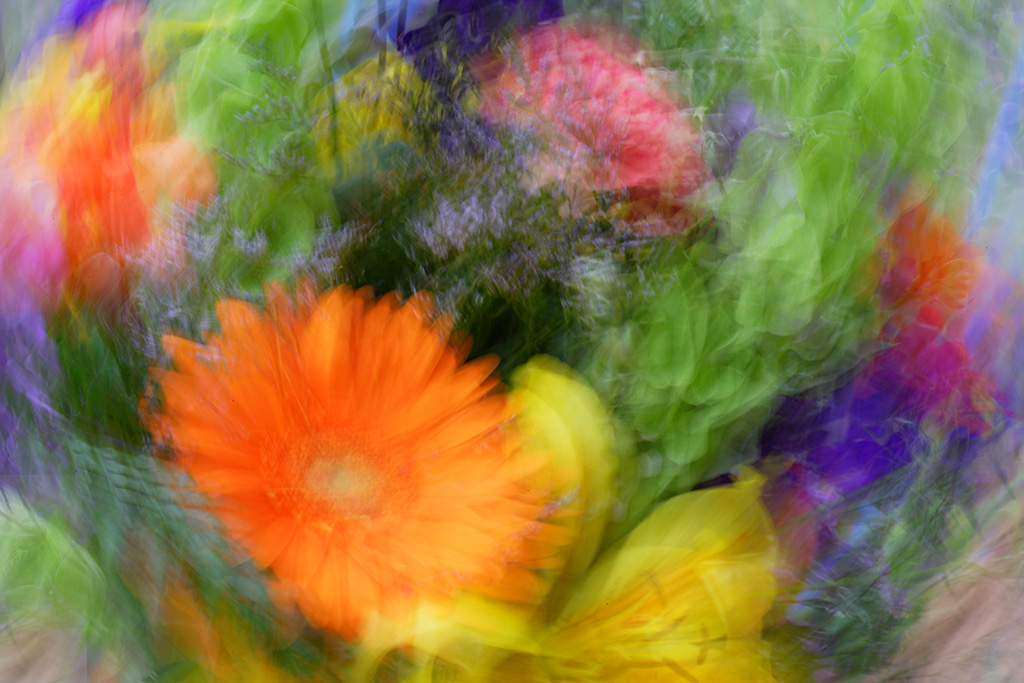
Tony Sweet is the master of Fine Art Photography. His books open up a whole new world. His books have many examples of moving the camera during a long exposure. This was very hard using film, but with digital it becomes much easier. That said, I've yet to get one as good as Tony's. Tony has 3 books and a DVD. I highly recommend all 3. The DVD is a little rough in it's production, but the info is terrific. I hear another DVD is on it's way.

Roses
Sometimes I feel like a nut - sometimes I don't. Once in while I just shoot stock photos. They won't change the art world but they do fine tune my photographic skills. These are simple clean images. Try one of these studies and you'll have as much fun as I do. It's a great way to keep up your skills when you can't get away.

Iris
So here's a run down.
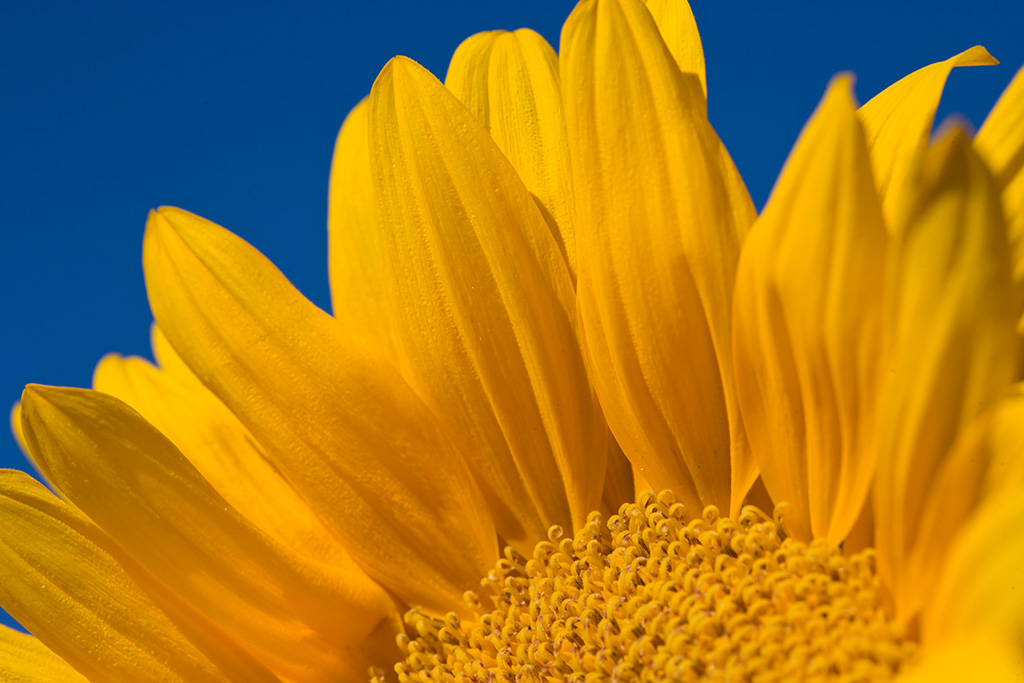
The top sunflower is in direct sun, shooting up over my roof - hence the deep blue sky. (100mm Macro - f8,250
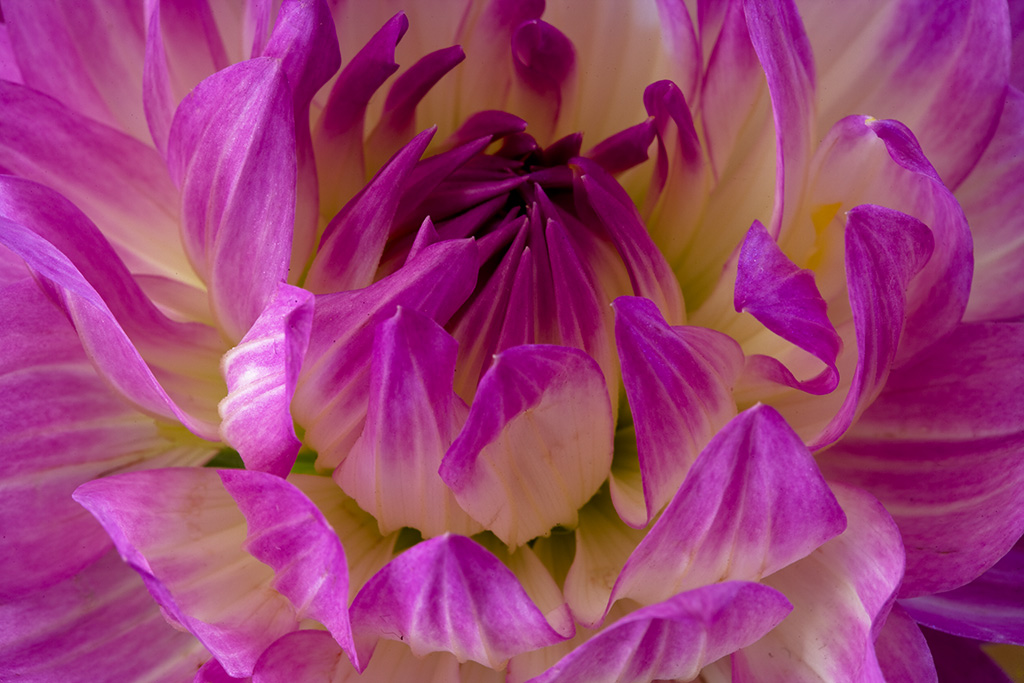
th) --- The Dahlia is in very soft light. There's a 
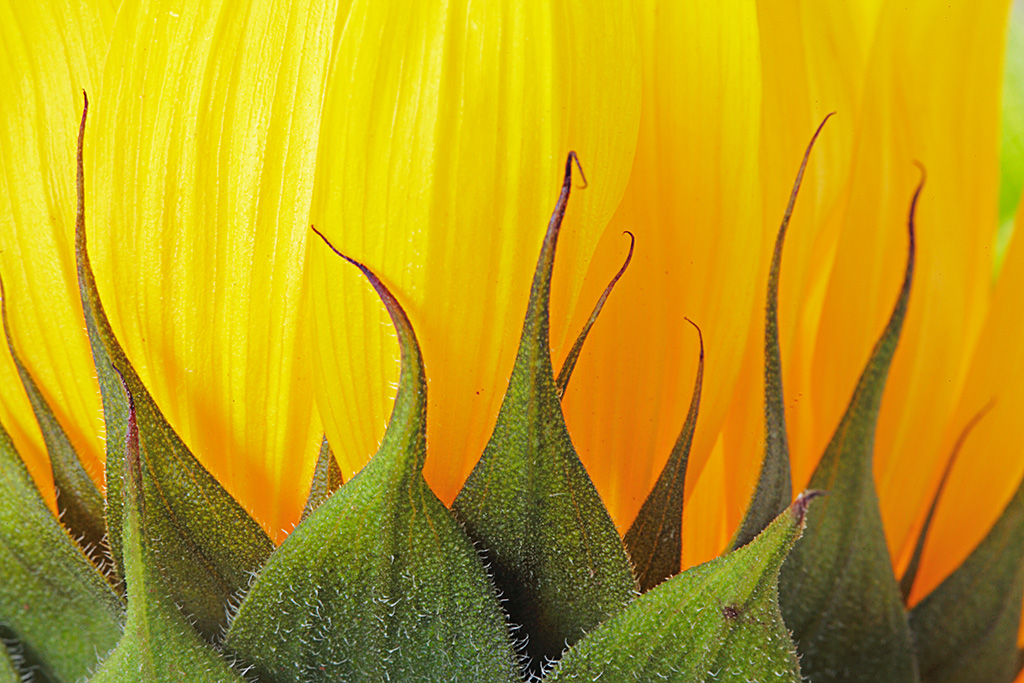
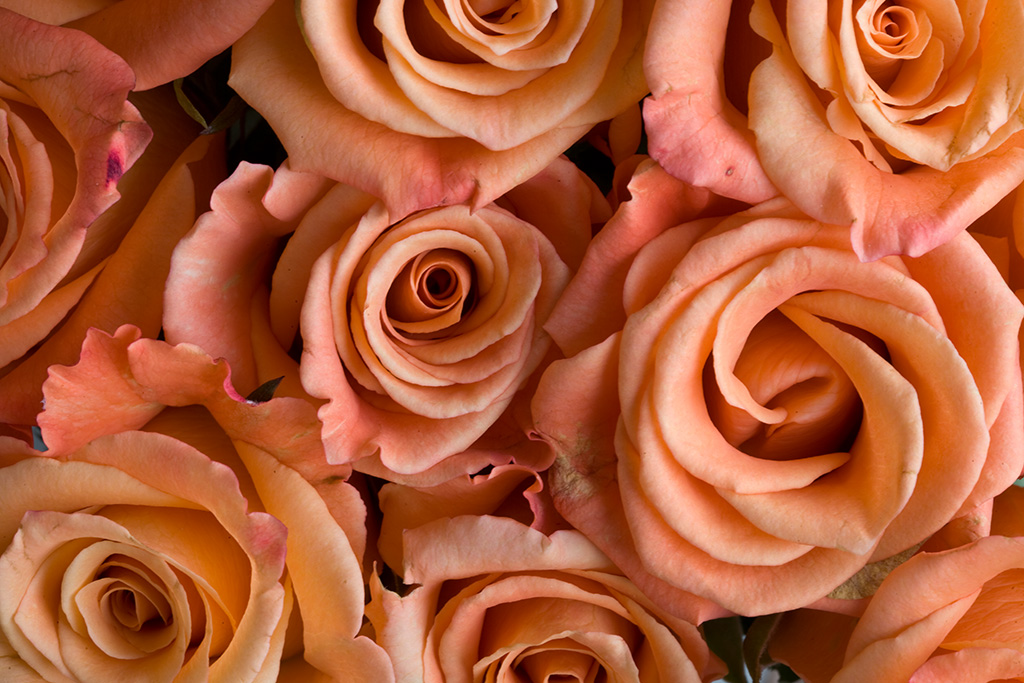
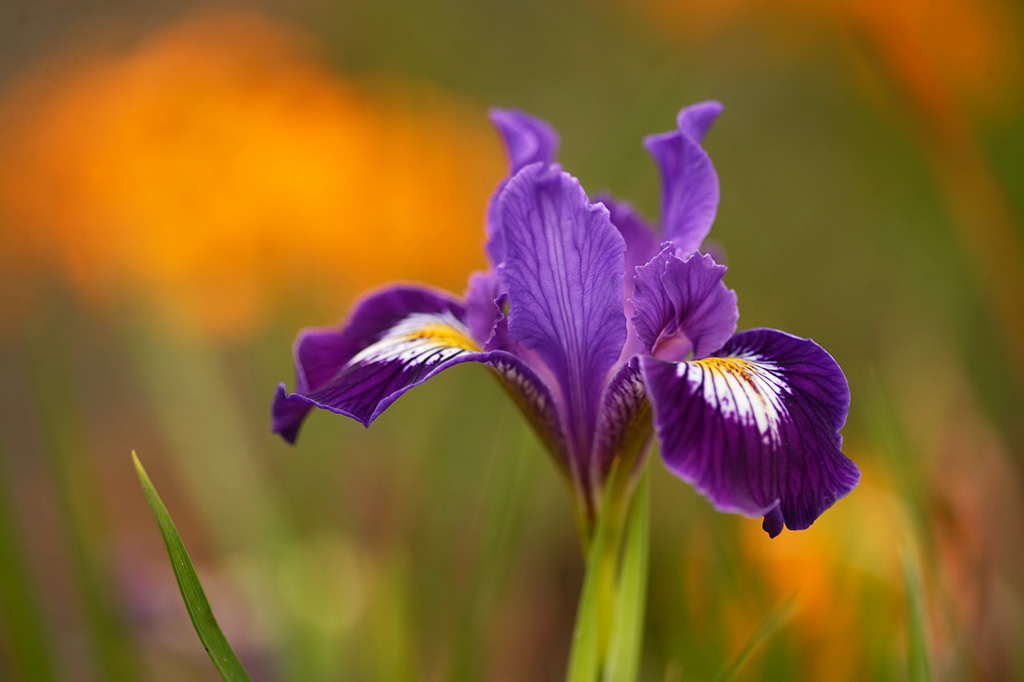
diagonal pull from the lower left to the upper right. (100mm Marco f16,1sec) --- The 2nd Sunflower shows a us different side. It's just as beautiful. The soft light accents the detail. (100mm Macro f16,0.5s) --- The Abstract Flowers were shot with a twist. (100mm Macro f22, 0.6s) --- The Rose Bouquet was shot in very soft light. Early morning fog. (100mm Macro f16, 2sec) ---The last photo was taken at Carmel Mission. I moved from Iris to Iris until I had the Poppies as a background. (100mm Macro F2.8,320th

For more flowers see my galleries Flowers 2 & Spring Garden
For more on Tony Sweet see his site.
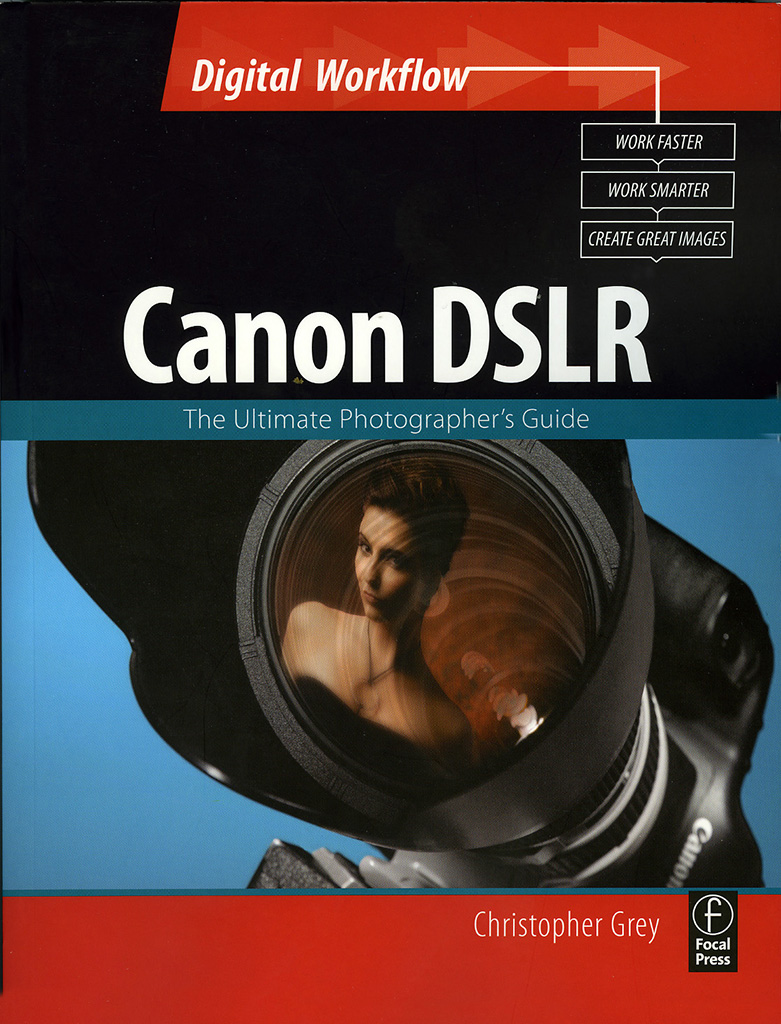
Saturday, November 10, 2007

Photographing Dead Horse Point

Dead Horse Point Sunrise
Just 45 min outside of Moab is Dead Horse Point State Park. The parking lot is small but the view is on a grand scale. Early Morning is the best time to capture this classic view of the gooseneck in the river and Canyonlands just beyond it. Sunset is also good for a variety of shots but not for this classic view. The best vantage point is to walk past the observation deck and continue along the path for about a 100 feet or so. You'll find plenty of foreground elements to add here. I used f22 to keep everything in focus. Your mileage may vary. There are no rails here so watch your step. If you trip they may have to change the name to Dead Man Point. Those signs are so darn expensive.

Dead Horse Point Sunset
The park has a small campground with 21 sites and covered picnic tables at each site. Showers are not available, but you can fill up your canteen. The park got its' moniker from some horses that died of thirst on the point. They could see the water, but it's a 2000 foot drop to get there. Please fill your tanks before visiting. You'll also want to take along Photographing the Southwest: Volume 1--Southern Utah by Laurent Martres. I have all 3 volumes.

Dead Horse Point Sunrise - TreeThe staff here is excellent. I asked about other photo locations and they were well versed on the entire state. The pictures here speak for themselves. This is a park not to be missed.

Note: the 1st pix is at just after sunrise and the next 2 are at sunset
For more info see Dead Horse Point State Park
and Issue 35 Canyonlands from Photograph America
For more photos see my Latest Additions Gallery

Thursday, October 25, 2007

Photographing Bryce

Bryce Point - Craig Wolf
It's not often that I get to sleep in a teepee, but that's just what happened on my trip to Bryce. I never like to plan things out I find it too restrictive. I like to follow the weather and the weatherman said that a storm was brewing in Bryce National Park. So packed up and headed from Moab down to Bryce. Now a teepee isn't great during a storm, but I didn't have a lot of choices since all the rooms both at the park and in town were full. Tourists were everywhere. I'd say about 50 percent of the people visiting were French and about 20 percent were either German or Italian. There were quite a few Japanese too, but not many Americans. The Europeans absolutely love Bryce! As for the teepee it was fun. It didn't rain while I was there, but I did get the clouds I was hoping for. Yippee kay ay!


Bryce Point,Utah - Craig Wolf
I went to Bryce once before and I really liked Bryce Point. Sunrise is the best time to photograph Bryce. I was the first one to get there. Many others showed up later. I imagine there were many more at Sunrise and Sunset Points. If you want to zoom in on some of the Hoodoos Sunrise and Sunset Point are the best, but if you want the whole enchilada I prefer Bryce Point. As for Bryce Point I like to photograph it just before the sun creeps over the horizon. It gets very contrasty after the sun comes up. It can be done if you have enough clouds softening the light.

Bryce Hoodoos - Craig Wolf
As for Sunrise and Sunset Point I like backlight. You might think that the face of the Hoodoos would be too dark, but they're so close together that you get light bouncing in from the other Hoodoos. You just have to pick out the ones that have that glow. It's truly amazing in person. The light show continues for some time after sunup. The shot here is from a previous trip because I just ran out of time on this trip and my back can only take so many days of sleeping on the cold hard ground. I hope you can make it to Bryce it's wonderful visit with or without a camera. There's some great trails to explore and if you like to gamble it's not too far from Vegas. If you really like to gamble try the teepee.

For more photos see my Latest Additions Gallery
Ruby's Inn RV Park with Teepees

Monday, October 22, 2007

Pixel Wrangler

Balance Rock - Craig Wolf
O.K. Here's a quick post of how light can change the mood of a photograph. While at Arches National Park the wind picked up and it changed from a nice sunny day into thunder showers. Then after standing in the wind and rain for hours I left.

As I turned out of the parking lot the light began to peek through the clouds and I drove right back and jumped out. I had been standing with a fellow photographer Robert Curtis who kept telling me that the clouds would break. Of course he had also left. As the sun poured onto the rocks, and the dark storm clouds remained in the background, Robert pulled up. He hadn't gone very far either.

The Sunset put on quite a show and I kept shooting right into twilight. I had plenty of time to make a couple of panoramas. It's amazing to see the dramatic change from photo to photo. It's the same subject only the light is changing. Ah the life of a Pixel Wrangler on the open range.

For more photos see my gallery.

Balance Rock - Craig Wolf

Balance Rock - Craig Wolf

Balance Rock - Craig Wolf

Balance Rock - Craig Wolf

Balance Rock - Craig Wolf
A special thanks goes out to Robert Curtis for encouraging me to stay.

Thursday, October 18, 2007

Photographing Mesa Arch

Mesa Arch,UT - Craig Wolf
After an hour drive from Moab and a short hike I arrived at the famed Mesa Arch. It was 45 minutes before Sunrise and I wasn't alone. At least 8 other photographers were already in place. In what was likely the very best spot was a Italian photographer with a 4x5 and to his left were 2 other pro photographers. By the time the sun came up the total had doubled (mostly Germans), but everyone was polite and I was able to get a good spot. Thanks to one and all.

Mesa Arch, UT Med Wide - Craig Wolf
I had seen many photos from this very spot. When sailors finally cross the equator they get a tattoo of Neptune. I believe with this shot you earn your right of passage, but instead of Neptune it'll be Ansel Adams. (Lovely thought huh.) Anyway, I thought that the sweet light would be right at Sunrise and last but for a few minutes. The light was good at that time, providing a red glow underneath, but the rest of the Arch was very dark, so I zoomed in a little to capture the under glow and valley below. I stopped down f22 and focused on the far lip of the arch which gave me enough depth of field to reach from the front face of the arch to valley below. I just let the sun peek through in order to get a sun star. (Make sure you use a small f-stop. I used f22.) I shot a few more and then I waited for the sun to really come up. About 15 minutes later the Arch had enough ambient light to show detail and the glow was just as bright. I angled my shot to show more of the Arch and a little sky.

Mesa Arch Panorama - Craig Wolf
About 40 minutes after Sunrise the glow was just starting to fade. Most of the photographers had left but a few die hards were still up front. (Including me.) I wanted to get the entire arch in so I did a quick pano group. I set my camera up in the portrait position (Vertical - an L-Bracket really helps here). I made sure that my focus, aperture and shutter were all on manual. I wasn't using a polarizer, but if I had I would have taken it off to ensure a even sky. Then I loosened the base of my ballhead and took about 8 shots with plenty of overlap. (That's not what hangs over my belt, but about a 50 percent overlap of each frame.) I just rotate the camera using the base. The tripod was fairly level, but not prefect.

Back at the ranch I stitched the frames together with ArcSoft's Panorama Maker 4. I thought the perspective would be off since I was so close, but it was fine. Not bad for one morning's work. As for the tattoo well...

Tech Info: Canon 1Ds Mark II, Tamron 28-75mm Lens, Gitzo Tripod, No Filters.
For more on Panoramas see my previous article A Stitch In Time
More more photos see my gallery - Latest Additions

Thursday, September 27, 2007

Rubbing Elbows at Maroon Bells


On the last Monday of September I drove straight from Los Angeles to Maroon Bells, CO. It took 15 hours and I was beat. I slept in the back of my SUV. I didn't want to miss sunrise. When I awoke it was dark and their was frost on the ground. It was an hour before sunrise as I walked down to the lake. Wow! At least 60 photographers were elbow to elbow. I grabbed a spot and watched as the conga line grow. Someone later counted 107 photographers.


I used a split neutral density filter for the first sunrise shot. It took on a nice red glow and the water remained calm for a perfect reflection. I used f22 and my focus point was about a third of the way into the picture to give me the greatest depth of field.


It was freezing cold so I took a hike to warm up. I stopped to take up near the creek and ran into Derek von Briesen. I met Derek while shooting Red Rock Crossing in Sedona. Derek gives workshops and I hope to join him on one soon. He's very gifted and has a talent for teaching too. You can check out some of his fine works at his gallery. It was great seeing him again.


It took an hour before the sun came up over the surrounding ridge and let the light poor onto the aspens. I think it was close to 10 or 11 when the pine trees on the left lit up. No filtration was needed as the light in the scene was now balanced. I tried a polarizer but the sky is already a dark blue.


I headed back down the road and spotted some aspens that I wanted to shot but it was too late. I returned the next day a little earlier and the light was just over the top of the cliff. The backlight really made the trees pop out. The stand of trees was perfect as a panoramic. I stitched them together with ArcSoft's Panorama Maker 4. For the how to's see my previous article here.


I got off to late start in the afternoon as I headed for Kebler Pass. It's about 2 hours to the crest from where I'm staying in Carbondale. Kebler Pass is a 26 mile long dirt road. When I passed over the top towards the Crested Butte side there was plenty of color but not much light. I spotted the perfect scene. It was a 30 second exposure @ f22, ISO 100. The wind blurred the leaves and gave it a painterly look. I returned the next day about an hour before sunset, but the light was never the same. I have many sharp pictures but none equal to this one.

I tried to post this while I was on the road but my server (iPower) locked up and I didn't want to spend an hour on the phone with them.

For more photos see Latest Additions on my gallery. These are straight off my laptop and need to be tweaked a little. I'll have additional photos, articles and color corrected images later this week.

Tuesday, September 18, 2007

Photographing the California Redwoods

California RedwoodsAs I headed back from Mt. Rainier to Los Angeles I took a chance and went to the California Redwoods. I was there as a child and I had a vague recollection of it. The best time to visit is late May through early June. Since it was August I knew I wouldn't be seeing any blooms, but there would be plenty of fog and a beautiful coastline.

I stayed in Klamath which is about dead center of the 40 plus miles of the various redwood parks. The State and National Parks have combined and now act as one big park. The 101 Freeway runs right though the park, but there's the old highway and many dirt roads off the beaten path.

False Klamath CoveOn the first night I went to False Klamath Cove. The fog rolled in and I only had about 10 minutes of color. I got a few good shots but I would not see another sunset. The fog came in every afternoon starting around 4.

California Redwoods - Coast Highway FogThe fog was so thick it made it tough to shoot along the coast. At times I wasn't able to see past the pullout. But fog and redwoods are a perfect mix. An early morning hike into the foggy woods is a surreal experience. The fog gets so thick it seems like you're walking though a painting. I went along the Coast Drive. It's a dirt highway off the 101 beginning at the south corner of Del Norte Coast Redwoods State Park. It hugs the cliffs along the coastline. You can see some of my photos here on a previous post. All fog no coast.

Paul Bunyan - Trees of Mystery
Sky Trail - Trees of MysteryI headed back to Klamath around 11 and stopped in at the "Trees of Mystery". It's a tourist trap to be sure. Years ago as you traveled up the coast you couldn't miss all the cardboard bumper stickers tied to each and every car. They were yellow with "Trees of Mystery" in bold red type. The park has made improvements but it's trademark 49 foot tall Paul Bunyan statue with a 35 foot Babe the Blue Ox along his side remains out front. Loud music is playing and Paul Bunyan shouts over the P.A. to the all little kids. They look up at in amazement at Big Paul as if he was really talking. My favorite part (as if that wasn't enough) was the Sky Trail a tram ride up the mountain. On a clear day you can see the ocean from here. It was still foggy so I couldn't see the ocean but there are plenty of other views right from the platform. You can hike the trail that winds around the top too.

Trees of Mystery
ElkLast but not least there are several herds of Elk in the park. They're usually right off the 101 on Davidson Road. There are many pull outs to shoot from. I found that for days 3 bucks stayed in front of someones farmhouse. You better not get close. They're wild and (at when I visited Canada) they have been known to run down joggers.

California Redwoods
With it's rocky coastline, towering trees and plentiful wildlife you'll have a wide variety to shot. It's also one of the easiest parks to photograph as long as you play along with the weather. A rule of thumb is to shoot the redwoods in the mornings and check out the coast at sunset. Of course a foggy coast can look great if the fog isn't too thick. I hope to return one spring when the rhododendrons are in full bloom. They would add a little extra sparkle.

For more photos see my Redwood National Park Gallery.
For an excellent photo guide on California's Redwoods see Photograph America
Don Gale Workshops is planning a trip to the California's Redwoods in late spring 2008

Thursday, September 13, 2007

Photographing the Columbia River Gorge

Columbia River Gorge
The last 2 summers I stopped off in Portland on my way to photograph Mt. Rainier. I'm always trying to cram in more than I should and the Columbia River Gorge is truly worth a trip all on it's own. I was only able to stay overnight each time. I like to stay in Troutdale which is just outside Portland and very close to the Gorge. The main freeway along the Gorge is the 84 but it's better to get off at Corbet Hill Road (Exit 22) and follow the signs towards Crown Point. (You''ll be turning onto Crown Point Road.) The road changes names and eventually becomes Historic Columbia River Highway. All of the main waterfalls are along this old highway. It's 2 lanes and very narrow in spots. You'll drive under canopies of trees and cross over some old moss covered bridges.

Crown Point
Portland Womens ForumI like to make my first stop Chanticleer Point which is cared for by the Portland Women's Forum. It's a small parking lot that has a view of Crown Point. It's a great location at Sunset. Sunrise isn't bad here, but so far the early morning fog has pushed me to Crown Point itself.

It's a short drive to Crown Point and it too offers many spectacular views of the Columbia River Gorge. There's more of a crowd here at Sunset, but almost no one at Sunrise. With a long lens you can pick out the sweet spots. (See Last Shot.)

Multnomah FallsMoving down the road you'll find many waterfalls, but the granddaddy of them all is Multnomah Falls. If you're coming from town take the main exit (for Multnomah Falls) off the 84 freeway you'll end up in the lower parking lot. If you take the Old Highway from Crown Point you'll be in the upper parking lot right next to the falls. There's a large Restaurant and Gift Shop and if you arrive late in the day you'll find bus loads of people. I recommend going very early, right after Sunrise, while the falls are in shade. After you get your main shots of the falls continue up the hill. Here you can get a few shots of the upper falls as well and you can cross over the bridge.


Columbia River Gorge
It's been sunny both of the times I was there, but if it's overcast I think I'd hike in to one of the other falls there. On sunny days with the extreme contrast of bright daylight and deep shade it's best to just enjoy the hike. You'll have the place all to yourself. I've never see anyone else on the trails. I hear Panther Falls, which is on the Washington side, is one of the best locations. There's a host of other falls listed in Robert Hitchman's Photograph America's Photo Guide. These are great guides and a true bargain. Please don't follow my poor example. Take your time and gorge yourself. (Did I say that?)

For More Photos see my Oregon Gallery.
For info on Mt. Rainier see my previous post Photographing Mt. Rainier.

Sunday, August 12, 2007

What! Using Flash For Nature Photography!

Dewdrops on Spiderweb
I'm slowly coming to grips with using a flash for Nature Shots. I generally prefer natural light, but there are situations that call for additional light. Here's one example on a foggy morning along the coast in the Redwoods. There wasn't much light and the wind wouldn't stop blowing.

Now, I just wanted a small piece of this web to really show off the dewdrops, but I couldn't resist trying to get the entire web at 2.8. (ISO 400.) The background is too bright in comparison to the web and too close to the web for the background to blur out. Even at ISO 400 and f2.8 it's still too windy to keep the web tack sharp.


Pumping it up to ISO 800 helps the freeze the motion and moving in a little closer helps separate the background. (The more you magnify the less depth of field you'll have.) It's still not tack sharp.

Now my flash comes to the rescue! With a Canon Speedlite Transmitter ST-E2 you can get the flash off the camera. Once it's off you can try it in different positions until you get the correct balance between the foreground and the background. At 2.8, only part of the web is in focus. Since I wanted all of the dewdrops on the web to be sharp I set the camera to f16. Not a problem since I'm using a flash and it will freeze the motion. You just have to set your camera up so it's not letting in the ambient light. Nice shot, I like it, but I'll try ISO 100. Nope, the background went black. (Just like I thought not enough power.) I'll stick with ISO 800 at f16.

So I was able to freeze the web and still pick up a little of the background at ISO 800 with one flash. With 2 flashes I would have been able to light them both up properly at ISO 100. Of course I left the 2nd flash at home. (What good was it doing there? Guarding the house?) I did run into some poison oak and picked up some rubbing alcohol to clean off my tripod. (And me!) Anyway, I like the shot, the dewdrops look like a pearls on a necklace.

Tech info: Canon 5d, Canon 580EX Flash, Canon Speedlite Transmitter ST-E2, Canon 100mm Macro Lens, Gitzo Tripod, Kirk Ball Head and L-Bracket (No spiders were harmed in the making of this photograph.)

For more on flash photography go to strobist.com - a "Must See Website"

Friday, March 30, 2007

Photographing Big Sur

Big Sur - Bixby Bridge One of the most beautiful drives in the world is along California's Highway One. Near the middle of the state, just below Carmel, you have soaring Redwoods on one side and high rocky cliffs dropping into the ocean on the other side of the highway. You'll often see this highway used in car commercials. Typically it's covered in a blanket of fog in the morning and then the skies clear in the afternoon. Big Sur with all it's majestic beauty and easy access is nothing but photographic opportunities awaiting you.

Big Sur - Ragged Point If you stay at the lodge inside the Pfeiffer Big Sur State Park you can just head out the door and take anyone of the many trails in the morning. There you'll find tall redwoods, waterfalls and a fern covered forest floor. You can also find many turnouts along Highway One that overlook the Cliffs. The fog helps to separate the cliffs. I like to keep my camera set on it's daylight setting. This captures the blue light and gives it a cool look. My favorite spot was Ragged Point, but the last time I was there they had a chain link fence around most of it.

Big Sur - McWay Falls In the afternoon if the cloud cover breaks a little you'll want to head down to Julia Pfeiffer Burns State Park. It's another state park just south of the Pfeiffer Big Sur State Park also on Highway One. It's easy to miss so I always like take along Andrew Hudson's "PhotoSecrets San Francisco and Northern California". It not only covers Big Sur but it also covers the San Francisco region and has a section on Yosemite. Complete with maps, beautiful photos and all the details. He even provides a clock face showing the best time to photograph each location. With Andrew's book you'll find an excellent map for finding Julia Pfeiffer Burns State Park. This is where you'll find McWay Falls. It's a 80 foot waterfall that flows into the Pacific Ocean. You won't want to miss this one even if it's socked in. Andrew has a beautiful photo of McWay Falls covered in fog. The fog gives it a mysteries mood. Often right at sunset there will be a clearing on the horizon and the sun will poke through.

Big Sur - Waterfall Another great way to get a feel for this location is Don Gale's DVD "Photographing San Francisco and the Central Coast." Don travels from Santa Barbara to San Francisco with many photo stops along the way. He shows a unique viewpoint at McWay Falls. You'll get an inside look to the thought process of working pro. Don provides many tips and locations. This video won a couple of awards including "Best Editing" by yours truly. I had so much fun. I actually went with Don on the trip and learned sooo much!A fun place to visit is Nepenthe Restaurant. It's a 4 star restaurant with a spectacular view of the coastline. Soak it all it in on their beautiful deck. It doesn't get better than this.

Big Sur - Forest
For great photoguides see Photo Secrets "PhotoSecrets San Francisco and Northern California"
For Don Gale's DVD "Photographing San Francisco and California's Central Coast"
These can also be found on Amazon.
For accomodations see Big Sur Lodge